It’s so sad when you see that the fungi are growing into your lenses. These microorganisms can decrease the sharpness of your photos and the more it grows, the worst it gets. It happened with my first camera lens, and after that, I took more care of my photographic gear.
So how to prevent fungus on camera lens? The fungi are organisms that love humidity and darkness. This way, the best strategy to keep away these microorganisms is based on let the sun rays hit your lenses daily and keep the air around it dry.
My name is Claudio Pereira, and I’m a Brazilian photographer enthusiast. Today, I will teach you how to create an antifungal dry box for less than $10. I’ll also share with you some tips and tricks on how to keep the fungus away from your lenses and make your equipment last forever. Take a look down below and enjoy it!
Contents
1. What is the lens fungus and how it grows?2. What do you need to create an antifungal dry box?
3. Step-by-step to create an antifungal dry box
4. Day-to-day lens care
4.1. Run away from the camera bag
4.2. Cleaning your lens properly
4.3. Let it sunning
4.4. Check the anti-mold moisture frequently
5. Your lenses have fungus, what can you do?
Conclusion
1. What is the lens fungus and how it grows?
The fungi are tiny organisms that grow in dark and humidity places. They produce spores that can easily spread throughout the room. So, the fungus which grows in the camera lens is the same mold that grows on the walls of the house. If you have your room walls full of mold, it’s a red flag to your camera gear.
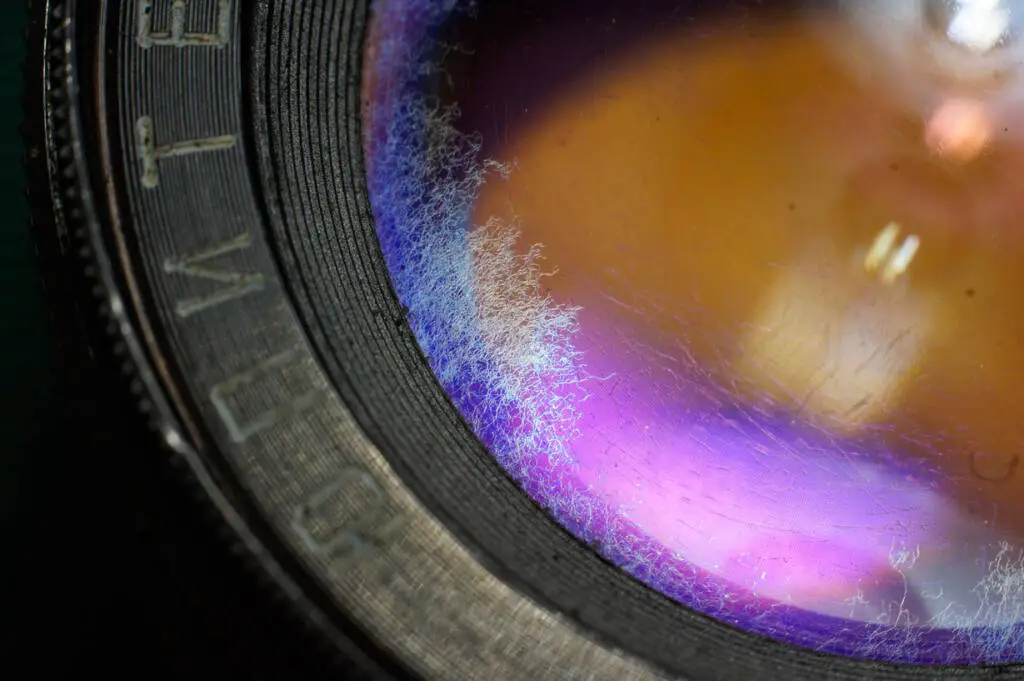
How to avoid fungus on camera lens? To prevent them, at first you need to keep the doors and windows open to let the sun rays enter the room, and also kill the mold in the walls with the proper solutions. Doing that, you can reduce the fungus culture, and decrease the likelihood that they will infect your equipment.
After, it’s a good idea to store your photographic gear in a dry box. These boxes can prevent the fungus from growing by reducing the water available in the air for them. It can be a game-changer for your equipment life.
2. What do you need to create an antifungal dry box?
You would not need too many things to start, It’s easy, and all these things will cost you less than $10! Look down below what I’m talking about:
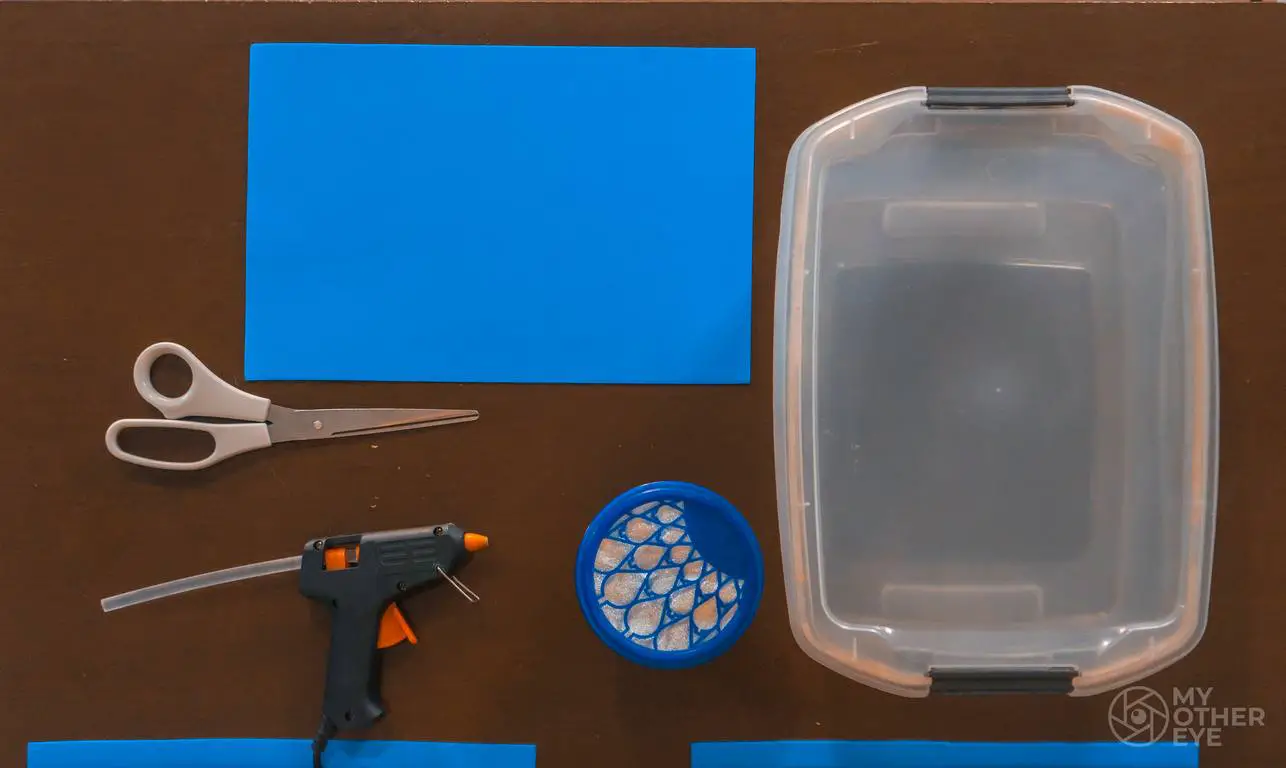
P.S.: Instead of the moisture, you can also use silica, and instead of the EVA plate, you can use silicone.
If you want to go further away, you can also buy a hygrometer, and store it inside your dry box to track the amount of water daily. The perfect relative humidity is between 35-50%, and it will prevent the fungus growth. However, just remember to not leave it below 30%, because it can evaporate the oil inside your lens, which will make it harder to focus.
In the next paragraphs, I will share with you the step by step to create a cheap and functional dry box.
3. Step-by-step to create an Antifungal Dry Box
Take one transparent plastic storage box and let’s go to work!
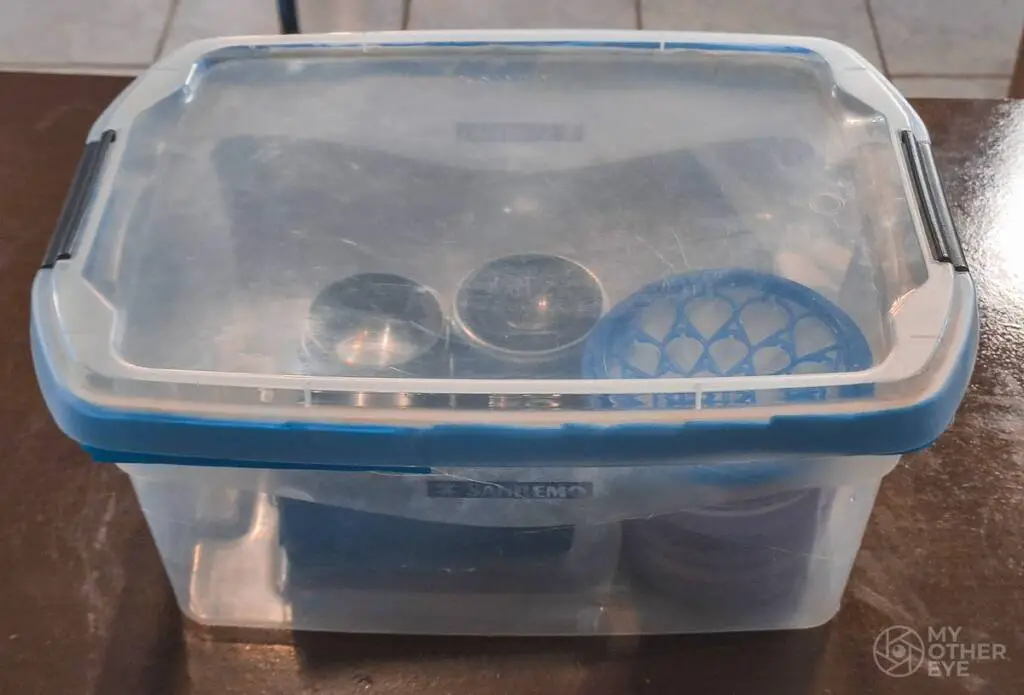
Step-by-step to create an Anti-fungal Dry Box For Camera Lens
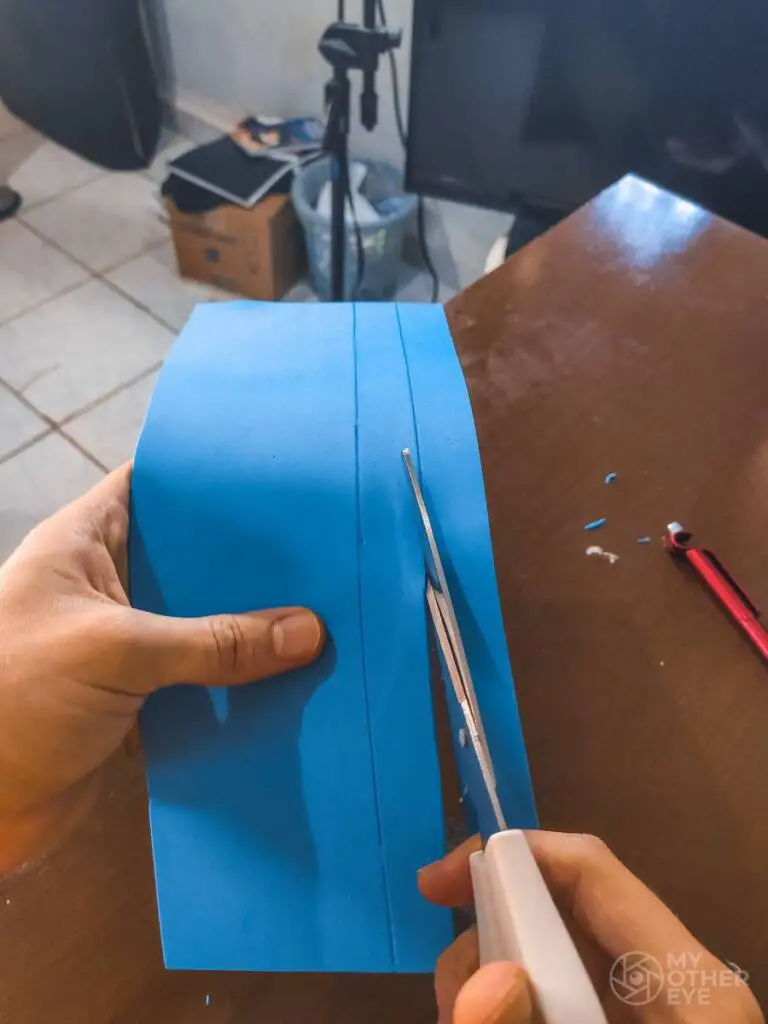
Cut the EVA plate

Measure the plastic box dimensions, and cut the EVA plate according to the measurement of the box’ sides.
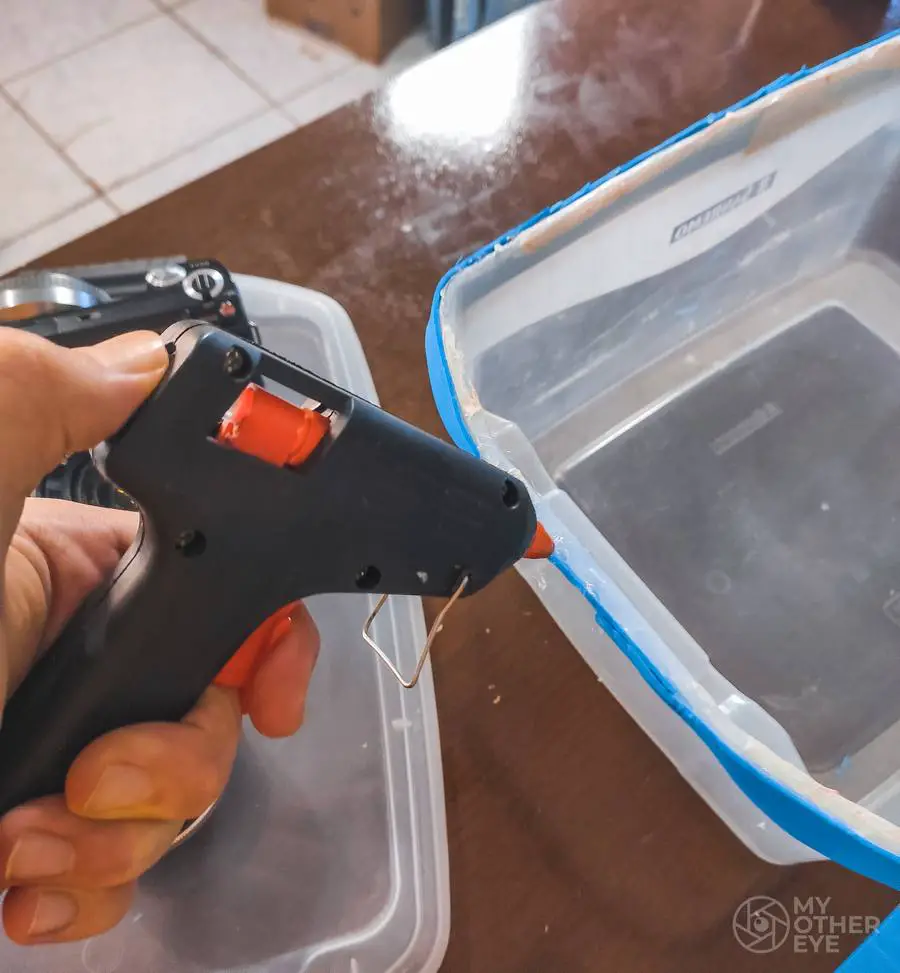
Glue the EVA plate

Glue the EVA plate in the plastic box sides with the hot glue.
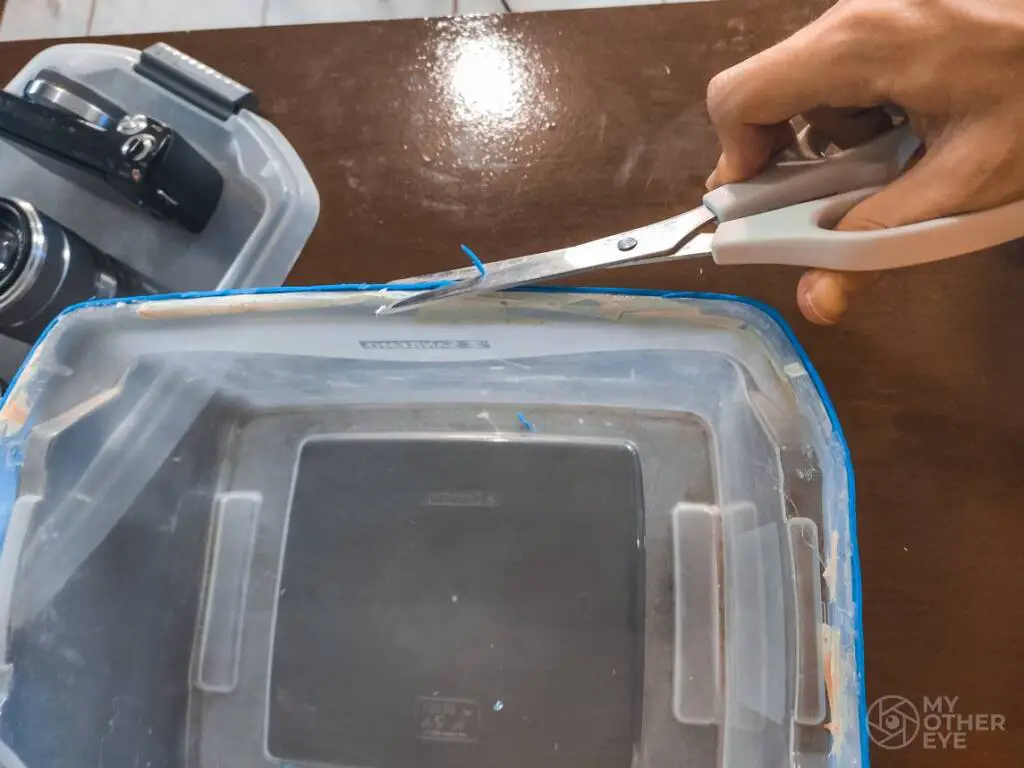
The goal here is to keep the dry air inside the box, preventing the humid air from outside enter the box.Trim the edges

Cut the EVA edges with scissors. This step is important to seal the box, preventing the entry of humid air from outside.
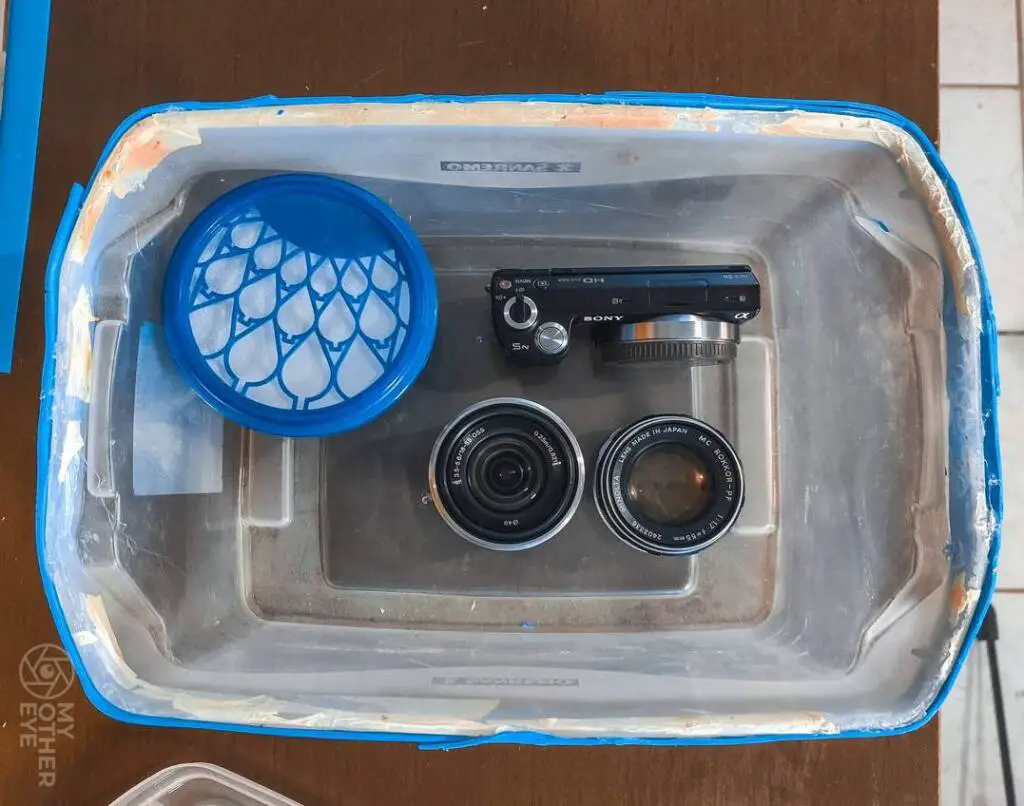
Put the anti-mold inside the box and close it

Put the anti-mold moisture inside the box, close it with your lens inside, and you are all set. Remember to check the moisture frequently, replacing when it needs to.
4. Day-to-day lens care
Here, I’ll share with you some tips and tricks on how to properly clean and store your equipment, keeping it healthy.
4.1 Run away from the camera bag
The photographic brands created the camera bags for us to move our photographic equipment easily and safely. However, forget your lenses inside your camera bag can cost you a lot, because it is usually a perfect spot for mold growth.
Whenever we go outside with our photographic bags, they catch a lot of dust and dirt from the environment. Also, these bags are always closed and dark inside. If you live in a humid climate, you have the perfect environment for fungus growing, and they’ll probably grow silent. When you realize, it’s too late!
So, if you have the option to create an antifungal dry box for less than 10 bucks, why do not do it right now?
As soon as you take more care of your gear, the better, and it can save you a lot of money and stress.
4.2 Cleaning your lens properly
Your camera lenses are like your babies haha If you don’t take care of them, they’ll get sick. So, you spent hundreds of dollars in your lenses, it’s better to keep them healthy, isn’t it?
The way to do that is by always cleaning them after a photoshoot, and store them in a safe place, such as a dry box.
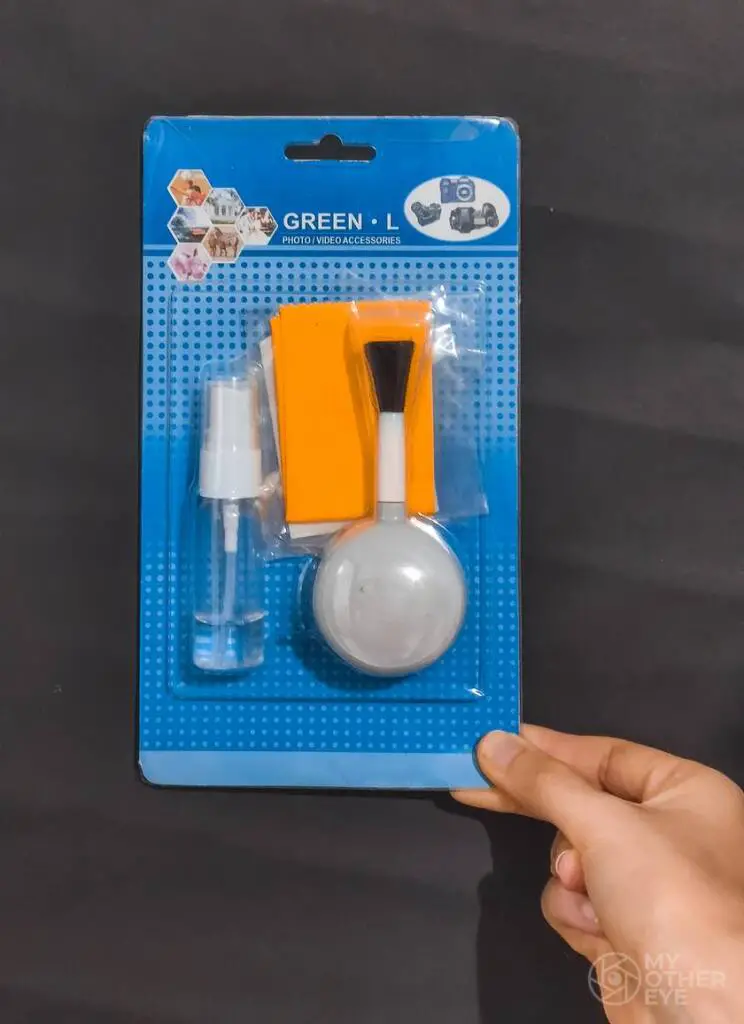
Cleaning your lens after using it is a good routine to maintain. It’s not too expensive to do that, and you just need to buy a cleaning kit for your lens. You can find a good one on Amazon for around $5 to $15, and they last for several years.
It’s pretty easy to use them. At first, you just need to clean the dirt off the camera body with a cleaning cloth. After, use the blower to remove the small dust in your lens and camera body, and the lens-cleaning brush to remove the remaining dirt.
Just remember to not touch the cleaning brush, because you don’t want to transfer grime into your cleaned stuff.
In the end, apply some cleaning solution in a piece of microfiber, and use it to remove the remaining dirt directly in your lens. Be careful to not apply the cleaning solution straight in the lens, because it can enter inside the lens body, and damage your equipment.
And it’s that. Just remember to put your lenses inside the dry box, and you’re all set!
Proper cleaning technique with the microfiber
Always clean with circular movements, whipping from the center to the edges, removing the dust and the grass to the borders, which can prevent you from scratching your lens.
Here I have a photo showing you my lens cleaning kit:
4.3 Let it sunning
The fungus contamination is directly proportional to the darkness of the room. This way, store your lenses in a place where they can catch the sun daily. It can prevent the microbes from growing and also kill the remaining fungus cultures.
You can leave it in a bookcase that catches the sunlight, or even on the floor. Just be sure they catch some sun rays every day.
If you use air-conditioning frequently, it’s even better to leave your antifungal dry box in this room, because it keeps the air dehumidified, killing the mold.
4.4 Check the anti-mold moisture frequently
Although the EVA plate has sealed the air incoming, there are still some gaps for the entry of the humid air from outside. Therefore, you must check the antifungal moisture constantly to be sure your equipment is safe.
You don’t have to be extremely cautious, and checking weekly or biweekly is the best choice. Usually, these moistures have a level showing when they need to be refilled, and after that, you just need to change it for a new one.
If you put a hygrometer inside, it’s way easier to you, and you just need to check if the relative humidity is between 35-50%, refiling the moisture when It’s over 50-60%.
5. Your lenses have fungus, what can you do?
Unfortunately, they can’t return to what they were before without the work of a specialized professional. However, you can prevent the fungus growing by putting your lens to have some sunbath, which can also reduce a bit the colony size.
If you prefer, you can also pay for a specialized worker to clean your lens. However, keep in mind it’ll probably cost you some money, between $40-150 depending on the gravity of the damage.
You can also try to remove them by yourself using the proper chemistry, just be careful and do it at your own risk. This post has all the steps to clean the lens-fungus by yourself.
Conclusion
And that’s it, guys! Following these simple tricks can keep your camera and lens safe from fungus, which prevents you from a lot of stress. I know it can bore doing all this stuff when you arrive at home tired from your photoshoot. However, if you want your equipment to last forever, it’s an exceptional way to do it, and the best part, it’s cheap!
This way, if you ask yourself how to keep your camera lens fungus free, you already know the answer. Always clean your lens after your photoshoots, using the proper cleaning kit. Also, take some time to build this box, and maintain your equipment safe forever.
Remember to keep your lens inside the dry box when you’re not using them, check the moisture frequently, replacing when it’s necessary, and you’re all set!
I hope you had enjoyed the post! If you have some questions, I’m here to help you as soon as I can.
Did you make a dry box like that? Share with us in the comment section down below what do you think about it!
Everything You Need To Know About The Brazilian Fruits
Everything You Need To Know About The Brazilian Fruits Brazil is a continental-sized country with a rich culture and nature. Because of its climate diversity,…

Stop Instagram From Ruining Your Image Quality
Instagram is lowering your image quality because it uses a lot of compression algorithms in all uploaded photos. There are some ways to avoid it,…

3 Best Ways To Put A White Background On Your Photos
If you want to put a white background in your photos in the quickest way, you can use the Remove.bg website. Another way is to…

Claudio Pereira
Author
He is a brazilian writing in english, a student of Medical School, and a Photographer during the free time. His passion for photography started in 2012 . After discover it, he never stopped.

